Tag: baby shower gift

Long time no post….

I know it’s been way to long since I posted! Like everyone else there’s just been so much going on. Boy have I missed sharing things here! Wanted to share that I’m getting back into the swing of things. From blogging and making more video tutorials! YES, you read that right!

I thought I’d start off with something that has been keeping my super busy lately! What is it you ask? Well, it’s bee’s…yup LOT’s of BEE’s!! They are selling like crazy and I can’t keep up! I did a video which I’ll share once it’s loaded on YouTube! I have to warn you though I’m a little out of practice. LOL!! Below are just a few I’ve made.

My inspiration came from TikTok – I first saw the pattern by Robin of Hooked by Robin on YouTube. Then I saw the Kaytedid’s one as well on TikTok. I played around and came up with different sizes that I wanted to share with you all!

Aren’t these the cutest??? This is the most popular size that I make. I do a Mini, Small and Medium which I’ll share with you below. YouTube video is now ready.

I hope you enjoy making them as much as I have. If you have any questions please don’t hesitate to ask.

Materials used
Yarn – Bernat Baby Blanket 6 ply Yellow, White, Black (small amount of #4 black yarn)
Hooks: Clover Amour K/6.50mm – https://amzn.to/2F4kcvt
Clover Amour Size L/8mm – https://amzn.to/336K9EO
Poly-Fil

Accessories: 
Safety eyes 9 or 10 mm, Tapestry needle or Crochet eyes

Abbreviations:
MC – Magic Circle
SC – Single Crochet
HDC – Half Double Crochet
INC – Increase stitches (2 in same stitch)
DEC – Decrease stitches (work 2 stitches together)
SLST – Slip Stitch
ST(S) – Stitch/Stitches 

Mini Bee

Instructions: 

Start with a Magic Circle (mc)

Rnd 1:  6sc in mc, join, ch 1 (6)
Rnd 2:  (sc inc) in each, join, ch 1 (12)
Rnd 3:  (sc, sc inc) around, join, ch 1 (18) 
Rnd 4:  sc in each st around, join, ch 1 (18) change to black
Rnd 5: sc in each st around, join, ch 1 (18) change to yellow   (Insert Eyes between rnds 3/4)
Rnd 6:  sc in each st around, join, ch 1 (18) change to black
Rnd 7: sc in each st around, join, ch 1 (18) change to yellow
Rnd 8:  sc in each st around, join, ch 1 (18) change to black
Rnd 9: sc in each st around, join, ch 1 (18) change to yellow
Rnd10-11: sc in each st around, join, ch 1 (18) STUFF your Bee
Rnd 12:  (sc, sc dec) around, join, ch 1 (12) continue to stuff lightly
Rnd 13:  Dec around, join, ch 1 (5) finish off – Stuff more if needed and weave in yarn ends.

Wings: Make 2 using smaller hook

Start with a Magic Circle (mc)

Rnd 1:  6sc in mc, join, ch 1 (6)
Rnd 2:  (sc inc) in each, join, ch 1 (12)
Rnd 3:  (hdc, hdc inc) around, join, ch 1 (18) Finish Off

Crochet eyes: F hook & worsted yarn.
Magic circle, 5 sc finish off. If too small add sc or use bigger hook

Attach to the Bee’s back – I placed mine in the middle of the bee’s back.

Small Bee

Instructions: 

Start with a Magic Circle (mc)

Rnd 1:  6sc in mc, join, ch 1 (6)
Rnd 2:  (sc inc) in each, join, ch 1 (12)
Rnd 3:  (sc, sc inc) around, join, ch 1 (18)
Rnd 4:  (sc x 2, sc inc) around, join, ch 1 (24)
Rnd 5:  sc in each st around, join, ch 1 (24) change to black  (Insert Eyes at Rnds 4/5)
Rnd 6: sc in each st around, join, ch 1 (24) change to yellow  
Rnd 7:  sc in each st around, join, ch 1 (24) change to black
Rnd 8: sc in each st around, join, ch 1 (24) change to yellow
Rnd 9:  sc in each st around, join, ch 1 (24) change to black
Rnd 10: sc in each st around, join, ch 1 (24) change to yellow
Rnd 11: sc in each st around, join, ch 1 (24)
Rnd 12:  (sc x 2, sc dec) around, join, ch 1 (18) STUFF your Bee
Rnd 13:  (sc, sc dec) around, join, ch 1 (12)  continue to stuff lightly
Rnd 14:  Dec around, join, ch 1 (6) finish off – Stuff more if needed and weave in yarn ends.

Wings: Make 2 using smaller hook

Start with a Magic Circle (mc)

Rnd 1:  6sc in mc, join, ch 1 (6)
Rnd 2:  (sc inc) in each, join, ch 1 (12)
Rnd 3:  (hdc, hdc inc) around, join, ch 1 (18) Finish Off

Attach to the Bee’s back – I placed mine in the middle of the bee’s back.

Medium Bee

Instructions: 

Start with a Magic Circle (mc)

Rnd 1:  6sc in mc, join, ch 1 (6)
Rnd 2:  (sc inc) in each, join, ch 1 (12)
Rnd 3:  (sc, sc inc) around, join, ch 1 (18)
Rnd 4:  (sc x 2, sc inc) around, join, ch 1 (24)
Rnd 5:   (sc x 3, sc inc) around, join, ch 1 (30)
Rnd 6:  sc in each st around, join, ch 1 (30) change to black  (Insert Eyes between Rnds 4/5)
Rnd 7: sc in each st around, join, ch 1 (30) change to yellow  
Rnd 8:  sc in each st around, join, ch 1 (30) change to black
Rnd 9: sc in each st around, join, ch 1 (30) change to yellow
Rnd 10:  sc in each st around, join, ch 1 (30) change to black
Rnd 11: sc in each st around, join, ch 1 (30) change to yellow
Rnd 12:  sc in each st around, join, ch 1 (30)
Rnd 13:  (sc x 3, sc dec) around, join, ch 1 (24)
Rnd 14:  (sc x 2, sc dec) around, join, ch 1 (18) STUFF your Bee
Rnd 15:  (sc, sc dec) around, join, ch 1 (12) continue to stuff lightly
Rnd 16:  Dec around, join, ch 1 (6) finish off – Stuff more if needed and weave in yarn ends.

Wings: Make 2 using smaller hook

Start with a Magic Circle (mc)

Rnd 1:  6sc in mc, join, ch 1 (6)
Rnd 2:  (sc inc) in each, join, ch 1 (12)
Rnd 3:  (hdc, hdc inc) around, join, ch 1 (18) Finish Off

Attach to the Bee’s back – I placed mine in the middle of the bee’s back.
Teddy Bears in the house

Seriously, How adorable are these Teddy Bears???!!! After making the 1st one I had enough yarn over to make the 2nd one! Not bad for 1 ball of Caron Sprinkle Cake! Which is a brand new line of yarn. Love this in Birthday Cake color and it’s self striping so you don’t know what color will be next. So in LOVE with how they came out.  I’ll for sure be adding these to my Etsy shop also! Thanks again to Sarah from Repeat Crafter Me for a GREAT Project!

If you are in the San Clemente area I’ll be adding them there too!  Of course went into work at Michaels last night and picked up some more. I got a new color too! I’ll show you that one a little later! Now to get ready for my Sons Baseball Tournament in San Clemente this weekend! I’m for sure packing my yarn! Let’s see what I get done!  Have a great weekend and until next time…..

Happy Craftin’,
Yvonne Metz
Vista, CA.

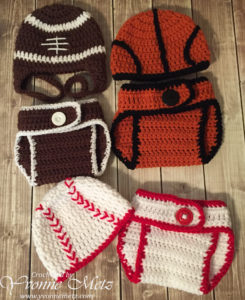
Let’s hear it for the Boys

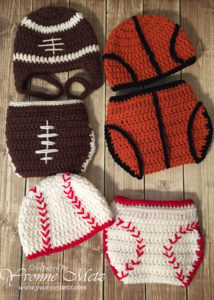
Baby Boys that is! I am seriously “Hooked” on making these Baby Diaper Cover outfits!  With Baseball in “Full Swing” it’s perfect timing for those New Born babies!  I’ve already added them to my Etsy shop which you can click on the link on the right hand side!

I just LOVE the back of these outfits and what a great Photo Prop these would make!  If you have any questions please don’t hesitate to ask! I will be listing the “Ready to Ship” ones that I have available this week sometime!  Thanks for stopping by and as always……

Happy Craftin’
Yvonne Metz
Sports Diaper Covers FrontSports Diaper Covers Back

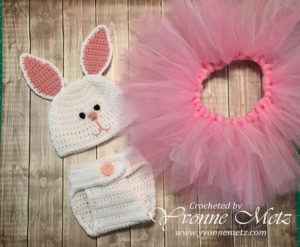
Bunny Diaper Cover and Tutu Set

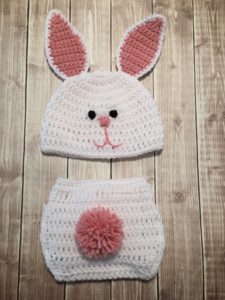
Bunny Hat Diaper Cover Front Hi Crafters!  I know Easter has come and gone BUT I just had to share this cute little Outfit I made for a special little lady!

This is my 1st time making a Diaper Cover set and a Tutu! I am SUPER happy with how this came out!
I will for sure share the photos with that cute “Little Lady” in this outfit!  It fit her perfectly!

Below is the photo showing you the back of the outfit!  I honestly don’t know why I waited so long to make this Diaper Cover Outfit it was extremely easy to make and as I show you more in the next few days they are also extremely ADDICTING too!

This  pattern was shared freely from RepeatCrafterMe website!  Her patterns are super easy to follow and she’s got TONS of them!  As always, thanks for taking the time to stop by my blog and if you have any questions please feel frBunny Diaper Coveree to leave a comment!

Thanks for stopping by and Happy Craftin’,
Yvonne Metz

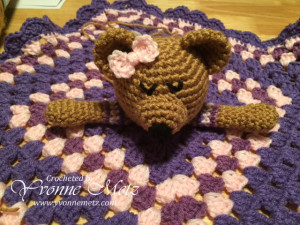
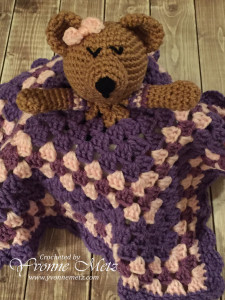
Baby Bear Lovey

Well as I mentioned before I added a new item to my Lovey Collection!  I had a customer ask for this sweet bear!  It was my first time making one and I have to say I’m pretty happy with her!  What do you think of the New Sleepy Bear Lovey?  I’ve got a few more coming out soon!

I may just have to try out some different color combinations too!  Any suggestions? I’m thinking I need to add a baby boy bear too! HMMM…..maybe with a baseball cap? Well as always thanks for stopping by!
Happy Craftin’
Yvonne Metz
Vista, Ca.

sleepy bearSleepy Bear 1


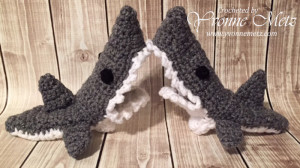
Super Sweet Shark Slippers

Happy Thursday All! Well I’m pretty please with how these Shark Slippers came out! My friend had posted them on my Face Book timeline and I just new I had to make them!
What do you think? I know something other then a Mermaid Tail Blanket right?!

Shark SlippersWorking on a Shark Hat next! It’s almost done. Just need to add the eyes. Of course I’ll have to make a Shark Blanket too right? I mean it just wouldn’t be right if I didn’t!

For my crochet friends out there I bought this pattern on Etsy. Here is the LINK.

The are pretty tedious BUT I really like how they turned out. I’ll be adding to my Etsy shop very soon!
Thanks for stopping by and as always.

Happy Craftin,
Yvonne Metz
Vista, Ca.

It’s I Love YARN Day and here’s what I’ve been Hookin’

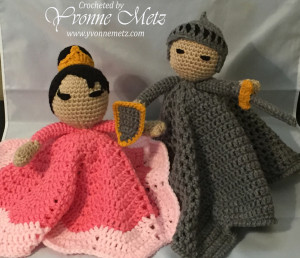
Happy I LOVE Yarn Day to all the “Knitta’s & Crocheters” out there – Or do I dare say “Hooka’s”??!!!  LOL!  So this was in the making – I absolutely LOVE making Crocheted Loveys! They are just so fast and quick to make up and just ADORABLE!  This is my latest! Stay tuned for more to come!

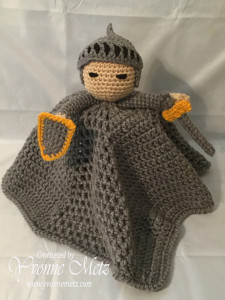
Knight and Princess So I posted on Facebook yesterday about the Princess waiting for her night! The photo was super cute as he wasn’t done yet!  Well I finished him last night!

I LOVE how he turned out! He’ll also be available in my Etsy shop very soon along with more options.  I’m having a blast making these up. Need more Princesses, Knights….hmmm how about a Prince? A little competition huh? LOL!


Knoble Knight LoveyI’ll post a few other projects that I am working on tomorrow.

So for now thanks for stopping by and as always,

Happy Craftin’,
Yvonne Metz
Vista, CA.

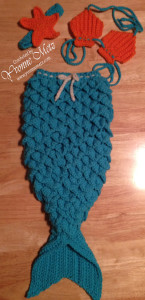
Crocheted Baby Mermaid Cocoon

Hey Crafters!  Well first I hope you all had a great and safe 4th of July celebration for those who celebrated!  We spent it with Family & Friends and GREAT Food!  I’ll have to share of course my Spinach Dip recipe but also that cake that was there! It was Yummy!

Mermaid Cocoon 1Well on to my finally finished project – Yes as the title of this post said Baby Mermaid Cocoon which I had been dying to make!  I have to say I’m very pleased with how this turned out too!

I found a great video on YouTube which I’ll post the link below for those who maybe interested in making one! Don’t be intimidated it’s really easy once you get the hang of it. I had to change it up just a bit as I wanted my scales to lay just a little differently!

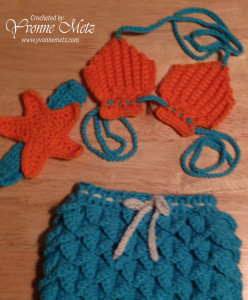
There are 3 videos 1 for the Body, 1 for the Bikini Top and the last for the Starfish headband! Click HERE for the Body part then you’ll see the rest.


Mermaid Cocoon 2Materials I used for this project were all Red Heart Yarn – Colors in Turqua, Pumpkin and a little bit of Aran.

I just LOVE the Starfish Headband & The Shell Bikini top!  This would make a great baby shower gift and a super CUTE Photo Prop of your “Little Mermaid”.

These will be in my Etsy shop soon as soon as I take just a little bit better pics! Just had to share before I call it a night!

Well that’s it for now.  I’ll be back tomorrow with the Yummy Spinach Dip Recipe! As always thanks for stopping by and…….

Happy Craftin,
Yvonne Metz
Vista, Ca.

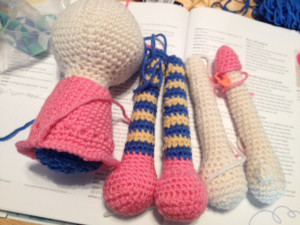
What could it be?

Project 2I’m baaack!!!  Any guesses yet to what it’s going to be?

Well it’s almost 8:00 pm over so it’s time chill for the night!  I’m for sure going to finish this up tonight! I’m hoping to anyway!

Ok, seriously??? I am obsessed with getting this done!  So you can bet I’ll be posting the finished project tomorrow!

I’ll be honest I’ve got more done then what is showing in this picture!  Let’s just say it’s coming out super CUTE!

Thanks for stopping by and as always…

Happy Craftin’,
Yvonne Metz
Vista, Ca.

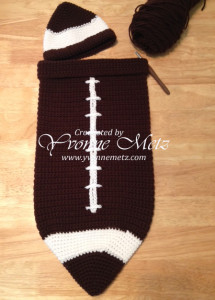
Crocheted Baby Football Cocoon

Football Cocoon 2Hi Crafters!

Well I am done with my latest project! I was done a few days ago BUT needed to take pictures!  I have been wanting to make one of these Baby Cocoons for some time now. I am very pleased with the way it’s turned out!

The materials used for this project are Red Heart Super Saver in White & Coffee and the hook I used for this project is Clover Brand Amour Crochet Hook 1049/J.  I normally use Boye hooks but lately I’ve been wanting to try out different types and styles.  You can see the image and link below.  I have to say it took me a little bit to adjust to it but once I got comfortable with it I loved how smooth it was. The handle has an easy grip too! I was able to crochet a lot longer which is always a PLUS!

Well now what will be on my HOOK next???? You’ll have to wait and see – it’s been something I’ve been wanting to make for some time now but just had to finish the “WIP’s” I already had laying around!  Ok, I have one more BUT it’s a knitting project! Does that count??  Oh well – thanks for stopping & as always…..

Happy Craftin’,
Yvonne Metz

error: Content is protected !!
0
0

Your Cart