Category: Pattern

Love Graph Beanie

Hey All! Hope your week is off to a good start! It’s been pretty busy around here! Working on so many different things! I’ve got lots to share this week as I’ve been on a video making mission!

If you are in our Facebook Group then you already know the popularity of the Graph Beanies! It all started with a Coffee Beanie! Then exploded to Mocha, Latte, Fighter and LOTS more! So here is the “Love” Beanie. It was the one that was voted on to make next AND to have a video made of it. Which is done! Thanks to Diana & Lynn for helping with the Graph!
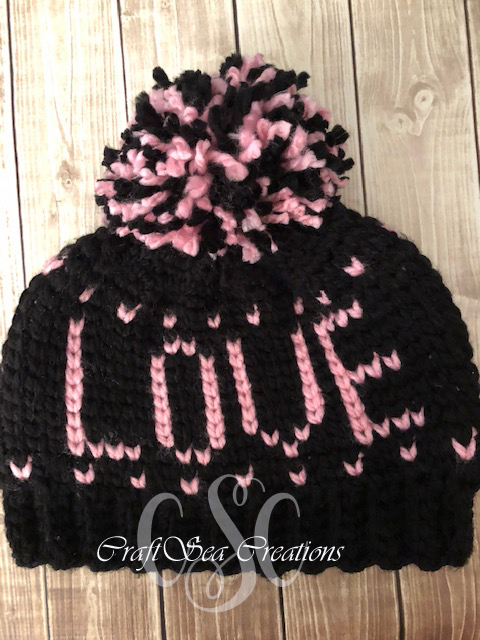
This is my 1st attempt at this type of Beanie and also using the Waistcoat stitch! Which is also known as the Knit stitch.  You can kinda see in the letters that it looks knitted.

So I’m sharing the pattern here with you all and I’ll also be posting the video when it’s done.  Thinking later tonight.  But for sure tomorrow. 

**UPDATE Video has been added below. Also just to note since this hat was made using a #5 Bulky yarn I was able to fit the words perfectly on the front.   Now you can use a #4 yarn (I plan on making one using #4 soon) but since the yarn is thinner your outcome will be different.  I’m just learning this Graph stuff but will share my tips & tricks along the way. 

Materials used: (amazon affiliate)
Yarn: Loops & Thread Charisma #5
Hook: Clover Amour Size L/8mm – https://amzn.to/336K9EO
Clover Extra Large Pom Pom Maker – https://amzn.to/2MkJskl
Yarn Needles – https://amzn.to/2O905lw

Love Graph Beanie Rev1

The pattern was updated to add a few things included a chart for left-handed crocheters. If you find any errors please let me know.  I am by no means a pattern writer at all. Just do my best to share what I did.

Lefty Video below


If you want to join our group on Facebook Click here:  FB Group

As always thanks for stopping by!
Yvonne Metz
Vista, CA.
The X-Over Beanie/Bun Pattern

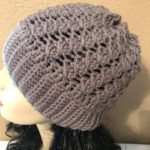
Happy Saturday All! As promised I’m here today with a new Beanie pattern! I came up with this pattern on my own. Very rare but it happens every now and then! My Mom actually showed me the stitch. She made a pretty scarf with it and I thought Hmmmm…we need a beanie to go with it. We have NO idea what the stitch is called so I made up the name. (X-Over)

So last year our Facebook Group we did a 6 week Hat Challenge. Every week we did a different hat that wasn’t already shared in the Group! Now that was hard to do as there are many Free patterns that we share! This was the Beanie we did the last week!

I’m calling this the X-Over Beanie because you are actually crossing over stitches to get this look. I’ll be doing a video on this one for those that are visual. If you have any questions don’t hesitate to ask me!

Thank you so much for stopping by!

Until next time Happy Craftin’,
Yvonne Metz

Baby Cable Beanies

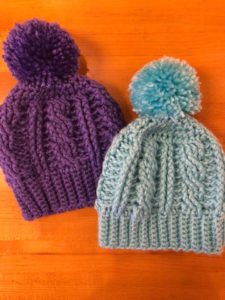
Hey All! I know LONG time no post – I tell you so much has been going on since my Granddaughter “Alana Elise” has been born! Being at my Daughters and helping her (C-Section) and working, Hooking and trying to make Videos?? I just need to slow it down! LOL! I have made a few new videos and am making more!  I wanted to share these 2 Hats I made for my Granddaughter with the Adult Cable Pattern!

I’ll post a photo with her wearing it! She doesn’t seem to be a fan of having things on her head! LOL! Anyway, here is the Pattern by Diana Borgstrom for the ADULT Version M@ssy Bun Cable Hat
UPDATED to ADD the BABY Cable – Baby Cable Hat

Now there are a few things that I’ll do different next time for the Baby Size – 1 is to make the brim smaller – I’ll do Ch 6 instead of the one that is in the Adult version although you can fold it up if you’d like. There will be a video made for this size coming very soon.

One more thing I did 50 rows for the brim and that fit her perfect. Remember this pattern is worked by measurements – so measure the head that the beanie is for. I just LOVE how tiny and cute this is and LOVE how this fits on my Granddaughter!

I have more to share and will do so very soon!  I just now seen some messages and I apologize for not getting back to you sooner. I’m usually notified when I get comments and I wasn’t. UGH! Anyway enjoy the pattern. Need to see the Video? You can see it HERE!

Thanks for stopping by and as always….

Happy Craftin’,

Yvonne Metz
Vista, Ca.


How to Crochet a Basic Granny Square

So the Basic Granny Square pattern has been around forever!  I would say it’s a Classic!  I just LOVE  how versatile it is!  It’s perfect for beginners too!  You can make so many cute things with it.  I learned along time ago how to make it.  I was also in several what they called “Friendship” Square swaps. It’s where you would make a certain amount of squares and send them out to the person Organizing the swap and in return you would get Squares from others. The Friendship Square blanket. I’ve got about 3 of them. One was a Christmas Theme, Spring and Any Occasion theme.  They were fun to make.  Once you got them all you’d crochet them all together to make your  Blanket.  You could also make Baby “Lovey’s”, you could just keep going and make one Big Giant Square til it’s as big as you want it to be. Change colors etc….ideas are endless!

Well my first video of the  year is “The Basic Granny Square”.  At the middle school I work at we have a Crochet Club and at the end of last year I had promised them a video and I finally got around to making it.  So I’ll share it here also.  I’ve got many more projects that are in the making so stay tuned.  Below the video I’ve got the Basic Instructions for The Granny Square.

As always thanks for stopping by and…
Happy Craftin’,
Yvonne Metz

The Basic Granny Square

Materials:
Yarn
Hook
Scissors
Yarn Needle

Abbreviations:
DC = Double Crochet
CH = Chain
Slst = Slip Stitch

NOTE: Ch 3 counts as your 1st DC unless otherwise noted

Instructions:

There are a few ways to start – here are my 2 favorite

  1. Do a Magic Circle/Ring
  2. Start with a Slip Knot, ch 4 and join to make a circle
    Either one is fine to do, your choice

Round 1: Ch 3, 2 DC into the ring ch 2, (*3 DC into the ring, ch 2) Repeat (*) 2 more times, join with a slst to the top of your beginning ch3, slst til you get to the ch 2 space.
*I call these 3 DC – Clusters*

Round 2: Ch 3, 2 DC into the ch 2 space, ch 2, 3 DC into the same space, ch 1, (*3 DC into the next, ch 2 space, 3 DC into the same space, ch 1) Repeat (*) 2 more times, join with a slst to the top of your beginning ch3, slst til you get to the ch 2 space.
*We just made our 4 Corners

Round 3:  Ch 3, 2 DC into the ch 2 space, ch 2, 3 DC into the same space, ch 1, 3 DC into the ch 1 space, ch 1 (*3 DC into the next, ch 2 space, 3 DC into the same space, ch 1, 3 DC into the ch 1 space, ch 1) Repeat (*) 2 more times, join with a slst to the top of your beginning ch3, slst til you get to the ch 2 space.
*We are now growing our Square

Round 4: Round 3:  Ch 3, 2 DC into the ch 2 space, ch 2, 3 DC into the same space, ch 1, 3 DC into the ch 1 space, ch 1, 3 DC into the ch 1 space, ch 1  (*3 DC into the next, ch 2 space, 3 DC into the same space, ch 1, 3 DC into the ch 1 space, ch 1, 3 DC into the ch 1 space, ch 1  ) Repeat (*) 2 more times, join with a slst to the top of your beginning ch3, slst til you get to the ch 2 space.

Repeat the process til you get the desired size you want.

A New Design “Just Chillin” Beanie

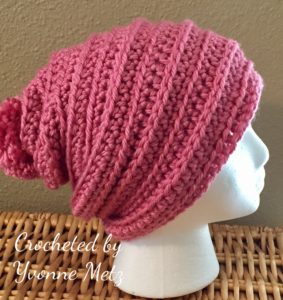
Seriously, not sure what’s gotten into me. I’m no Designer but these just keep coming! Totally inspired by ALL the AWESOME talent out there!  So here is my latest “Just Chillin'” Beanie! It’s so laid back and it’s got that slight Slouch to it and of course a POM POM!  I’ve got a video in the works and will post it as soon as it’s loaded.

But for now here is the Free PDF pattern – Just Chillin Slouchy
As I said I’m not a Designer by any means and this was made to fit a Teen/Adult I’m sure you can do any size just by measuring the length of the band.  I’ll try and experiment with different sizes later OR if you have any ideas leave me a comment!  Questions about the pattern let me know this too!

Well Grandson is here so I’m off! Thanks for stopping by and as always…..

Happy Craftin’,
Yvonne Metz

The BoHo Messy Bun Beanie

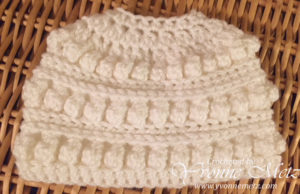
So as promised here is my new Messy Bun Hat Design! So this is very rare that I create a Design I normally test patterns for others! LOL! But here they are straight from my brain and inspired by so many hats I’ve seen!  Super warm and cozy.

I’m calling this The “BoHo Messy Bun Beanie”.  Which was inspired by a member of a FB Group I’m in. I originally thought “Bohemian” but was like hmmm. I thought BoHo then as I saw a comment on my post suggesting the same name! Great minds think alike right?  Anyway I’m working on a video for this hat. Hopefully this week! It’s super easy and FUN to make!

This one I used Red Heart with Love yarn #4 worsted in color Mango! Doesn’t it just POP!  You can’t tell from the photo but it’s super squishy!  I’m just in love with this look.  It’s got that casual but also Elegant look about it.  I’m thinking I see a matching scarf to go with maybe?  Oh yes I see it and Infinity style?  Hmmmmm…..sounds like another Design pattern in the making!

If you are interested in purchasing a Beanie these will be in my Etsy soon. If you are a fellow crocheter you can download your copy here! BoHo Messy Bun Beanie If you have any questions about the pattern or you find mistakes please let me know. Once you get the hang of it they are pretty fast to make.  As mentioned above I’ll be doing a video soon so if you want to see the video (some of us are visual – I LOVE videos) then subscribe to me on YouTube so you know when I load the video.  The link is up above on the right.

Lastly, here is a Messy Bun version which is in the pattern.  I mean you can’t make a hat now a days without it being a Messy Bun too right?  This one uses Red Heart Essentials  yarn!

Stay tuned for the next one I’m going to share it’s another one that was in my brain.  I will be sharing this a little later today so come back and check it out!

Thanks for stopping by & as always…
Happy Craftin’,
Yvonne Metz

Doll Size Mermaid Tail Blankets

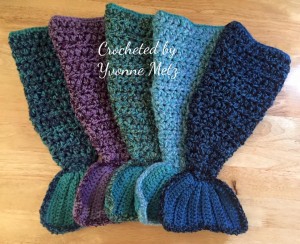
Doll Size Mermaid TailsSo here are my 18″ Doll Size Mermaid Tails I created!  I was totally inspired by MJ’s Off the Hook Creations as I mentioned in another post! I LOVE how fast as easy these are to work up!  I’ve had some of crochet friends test the pattern for me and made a few changes and it’s ready!  So here is it FREE for all my “Hookin’ Friends” to enjoy!
PATTERN: 18 inch Doll Mermaid Tail Blanket Pattern  If you have any problems loading it from here please let me know.

These will fit an American Girl doll or any 18″ Doll plus I’m sure it will for sure fit those little blessings that decide they want to come into the world just a little sooner they are suppose to!

Don’t crochet and want to Order? Check out my Etsy Shop Link to the right. Order a matching one for your “Sweet Little Mermaid” how cute to have matching ones!  I’ve added many new sizes to my shop. I’ve got new colors coming too!

Thanks for stopping by and I’ll be sharing some more goodies very soon!

Happy Craftin’,
Yvonne Metz
Vista, Ca.

Free Crocheted Bow Scarf Pattern

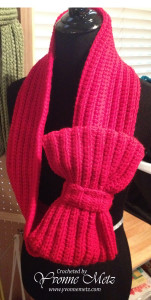
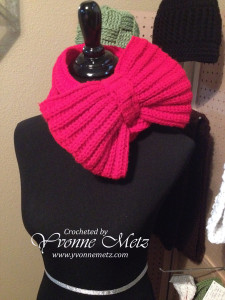
Good Evening All!  Hope your Friday is a great start to your weekend!  Just wanted to share this super fun and easy crocheted scarf!  For those that crochet you’ll not believe how easy this is.  My daughter saw one and looked for a pattern and couldn’t find one so she asked me if I’d be able to make one!  This is what I came up with!  She loved it!

Bow Scarf 1 Bow ScarfAs you can see you can wear it a few ways!

How fun and trendy is this?  For those that know how to crochet you can get the pattern by clicking Scarf with Bow
If the link doesn’t work let me know.  You’ll see when you open it that it’s super EASY to make.

For those that don’t and would like to purchase one they will be available in my Etsy shop soon. Click on the Etsy link on the right if you don’t see them yet please send me a customer order request OR contact me.  They will be listed soon.  But get your orders in early as the Holidays are around the corner!

If you have any questions with the pattern please don’t hesitate to contact me.  I’ve never written up a pattern before.  The pattern is shared freely so please don’t sell it!

Thanks for stopping by and as always….

Happy Craftin,
Yvonne Metz
Vista, Ca.

More Crocheted Little Mermaids

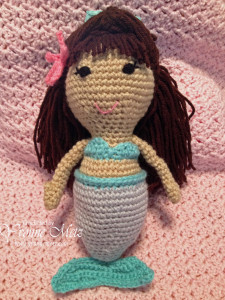
2nd Mermaid - 1So as promised here is the 2nd Mermaid Doll I made!  I really  like how she turned out too!  She’s absolutely perfect!

These are very addicting to make I do have to admit!

This is paid pattern which you can get HERE – It’s super detailed and has awesome pictures to follow.

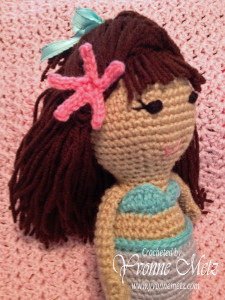
A lot of hard work went into this pattern. It takes so much time to make sure written patterns come out right!   Below is a side view picture!


2nd Mermaid
Here is a side view – Don’t you just love the “Star Fish” in her HAIR?????  It’s a great touch!

Well until next time thanks for stopping by!

Happy Crafting,

Yvonne Metz
Vista, CA.


Crocheted Mermaid Dolls

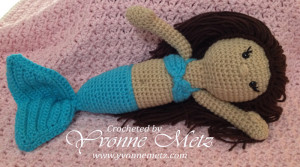
Mermaid 4I’m back and ready to share my first Mermaid Doll I LOVE how she turned out!
For this one I used the following Pattern from Ravelry but I changed her Tail and I used this Pattern for that.  Oh and I added a belly button, not sure if you an see it that good! But I just had to try!
I also made up her Bra Top.  If you’d like to know how I did it please don’t hesitate to ask me!  IT was super easy!  These will be going into my Etsy Shop very soon.  I’ve got one more to show you which I’ll post tomorrow morning.  It is another great pattern and a super cute Mermaid!  So come back and check it out!  Thanks for stopping  by and as always….

Happy Crafting,
Yvonne Metz
Vista, CA.


error: Content is protected !!
0
0

Your Cart